Showing posts with label crafts. Show all posts

Wednesday, April 11, 2012

Let It Be...


This project took a bit longer to complete than anticipated. Not because the project itself took a long time, but it took me a long time to decide on paint colors and letter design. So finally, I decided to stop over-thinking (if you have been following me, you know I struggle here!) and just decide on something - even if it is not the perfect choice. And in the end, I like it a lot.

Oh, and I chose the phrase "Let It Be" because I love the words, I love the song, and I need these words constantly reminding me to just let thing be, to not over-think, to let go of control, and just roll with the unplanned punches of life sometimes.

Here's how I did it:

1. I printed out some large black letters - I think they were 650 font. Then, I cut those out.
2. I picked scrapbook paper I liked, and traced the above black letters on to it. Then, I cut those out.
3. I painted the canvas. I couldn't find the color of blue I wanted, so I mixed a bright turquoise I already had, with a blue-grey color called Blue Jean. I painted 2 coats, including the edges and allowed a few hours between paint coats. (The color in the pictures looks quite a bit brighter than it does in person)


4. I figured out the placement of the letters and where I wanted them on the canvas. You could measure this for precision - I am too impatient though and prefer to eyeball.
5. Then I mod podged them on the canvas.
6. Once the letters were on, I  mod podged over the whole canvas and letters to finish it.
7. Let dry (this is is the stage where you look at it and think you just ruined the whole piece with mod podge - don't worry, it is supposed to look like that and dries clear.


**So if you look close in my finished piece, there are some streaks that did not dry clear on the middle right and I have no idea why. I am a veteran mod podger and have not had this happen before. If anyone can fill me in on what went wrong, or better yet, how to fix it - I would be thrilled :)
Pincushion Creations

Tuesday, March 20, 2012

10 things to do with a sick (young) kid

While I generally have very healthy kids, this winter has felt like one illness after another. Having sick kids is no fun, and the biggest reason for me is how sad it is to see their normally endless energy selves feeling so lethargic and icky. When my kids get sick, they get pretty spoiled (as they should when they are sick in my opinion), and I try to bring as much "fun" to the sick party as I can.

Here is an art project A and I did together today while she was sick at home. I wasn't sure we were going to get to it because she was pretty much glued to the couch all day, but she surprised me with some evening energy to move to the table for a little craft time. I was inspired by this. It provides a bright and cheerful piece on our playroom art wall and fitting for the first day of spring (even though it still feels like winter outside).


10 things to do with a sick (young) kid:

1. The obvious go-to - watch movies.
2. Build a fort. Snuggle and read books together in it by flashlight.
3. Make homemade playdough. Even though you have a huge bin of it already, because making your own is really cool to a kid (and pretty cool to me as an adult too).
4. Print out new coloring sheets and let them pick which ones. We like Disney, Sprout, and Nick Jr.
5. Have a pretend birthday party for a special doll or stuffed animal.
6. Sing silly songs together. Laughter heals all.
7. Build a "snuggle nest" (huge pile of blankets and pillows) and snuggle, sing together, read together, nap together, watch movies, etc.
8. Plan a special art project to do together. (see ours from today, above)
9. Play "Couch I Spy" - just like regular I Spy but from the comfort of the couch - if you can see a window you can include things outside too.
10. Talk. About everything, and nothing, and all the things you haven't taken the time to ask about or talk about during the normal hustle and bustle of healthy life.

What do you do with your kids to make sick days a little more fun? I would love to hear your ideas too!


Linked up to Linky Parties:
Pincushion Creations
Tip Junkie handmade projects

Thursday, March 15, 2012

Re-Purposed and Grown Up

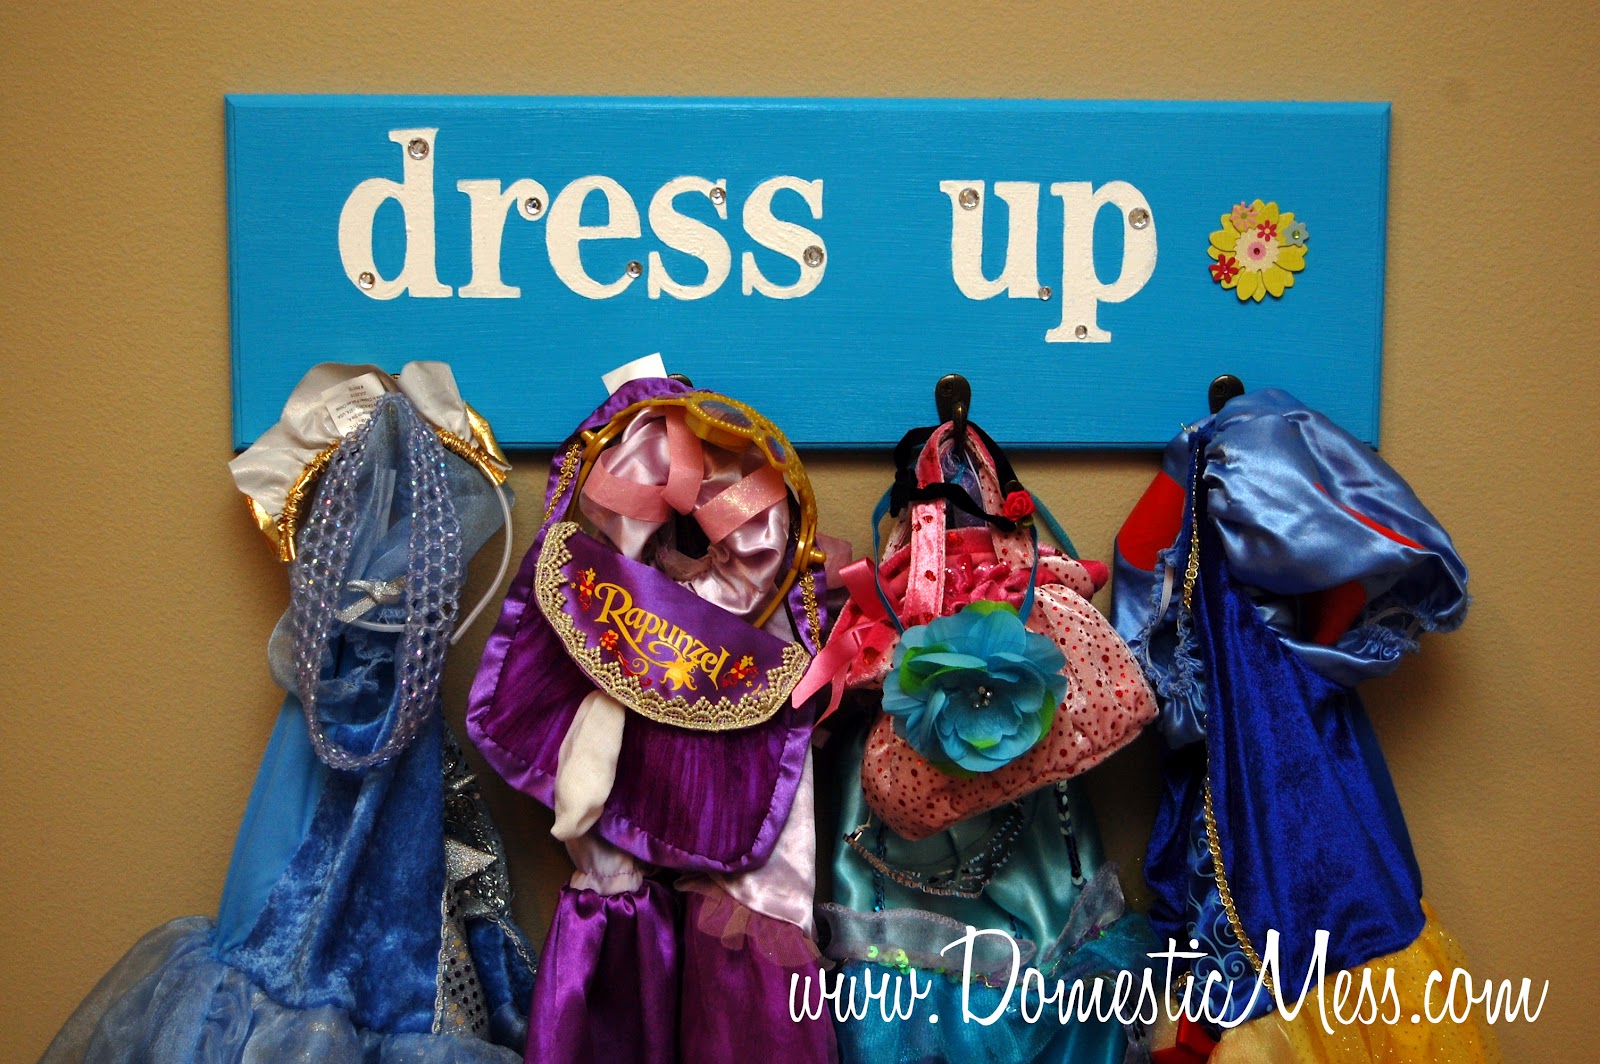
A had a very girly, very pink baby nursery. When she started becoming more of a little girl, I re-did her room (adorable owl theme - and blue walls...I think I had enough of the pink). I sold and donated some of her nursery decor items but a few of them I held onto to re-purpose (even though I didn't know yet what for). This is one of those items I kept.

I loved this coat hanger in her nursery. I love what it said, and it just fit with the sweet pink theme that was going on in there. (I searched my computer files and could not find the before picture of this - not sure what happened to it. So I found this pic of the exact same  print. The only difference is mine didn't have a frame and it had hooks for a coat rack. But the design/saying/colors are identical.)

I had many ideas of what I wanted to do with this, but ultimately, I decided it needed a home in the playroom. Here is what I did to it:


Bright blue paint, white letters, some flower detail, and of course a little bling for her majesty. Screwed the hooks back on and voila! Easy enough.


I think it turned out cute. Fun and bright - and much more grown up (kid grown up...) than the sweet babyish decor it once was. And best of all, it serves a purpose! It is perfect for hanging up dress up clothes, and while it doesn't hold all of them (hence the bin below it), it highlights some of A's favorite dresses. I love functionality. Ultimately it was a little sad to cover up those sweet words, but I like knowing they are still under there and I LOVE that I was able to re-purpose something that no longer worked for us.

What items have you re-purposed? I'd love to hear about them!

Linked up to Linky Party:

Pincushion Creations